Google OAuth in Node.js Using Passport.js
October 27th, 2021 . 19 min read
OAuth (stands for Open Authorization) is a standard protocol that allows an app to get delegated access to resources of a 3rd party service like Google, Facebook, Github, etc. OAuth is one of the most popular ways to authorize users in modern web apps because of its:
- Security: OAuth doesn't share passwords, instead, it uses authorization tokens to identify users. So the consumer's password is safe from breaches.
- Better UX: It's more convenient for users to sign in with a few clicks than to fill out a giant form.
- Better DX: OAuth is simple to implement and developers don't have to worry about the complexity of authenticating users.
In this article, we will build a Node.js app that uses Google OAuth to sign in users and we will use passport.js which will make the whole process simpler. You can reference the GitHub project linked below if you get stuck in any section. So, without further ado, let's start.
Github Project Link: https://github.com/SamipPoudel58/nodejs-ts-google-oauth
Initial Setup
Create a folder and initialize the application as follows:
mkdir oauth-app

cd oauth-app

npm init -y
Install all the necessary packages, we will be using these to build our app.
npm i express mongoose ejs passport passport-google-oauth20 cookie-session dotenv
We need express to create our server, mongoose to query our database, ejs as our templating engine to render HTML pages to the client, passport & passport-google-oauth20 to handle the whole OAuth process, cookie-session to store user session data in a cookie, and dotenv to manage environment variables.
Besides these packages, we will need some more packages for our development process:
- typescript - We will need the typescript compiler to compile our
TypeScriptfiles intoJavaScript. - ts-node - ts-node can run typescript files directly without compiling them to a javascript file.
- nodemon - nodemon automatically refreshes the server as soon as it detects a change in the files.
- Type Definition files - Some of the packages that we installed need their respective "Type Definition" files to work with typescript.
We can install these packages as dev dependencies (using -D flag)
npm install -D typescript ts-node nodemon @types/node @types/express\
@types/passport @types/passport-google-oauth20
We can configure typescript's behavior using tsconfig.json. To generate this file, use this command:
tsc --init
We will set our root directory to be ./src and the output directory to be ./dist ( this is where typescript will output our javascript files ). In your tsconfig.json find "outDir" and "rootDir" and comment them out and edit them as
"outDir": "./dist",
"rootDir": "./src"
Inside the src folder create a file app.ts.
Now let's add scripts in package.json
"start": "node dist/app.js",
"dev": "nodemon src/app.ts",
"build": "tsc -p ."
Importing Environment Variables
We will be using credentials and keys that should be secret from the public. We can store them in a .env file. Create a .env file at the root of your project.
Make sure you add it in your
.gitignorefile, so you don't accidentally commit and push it for the whole world to see.
Add these variables and their appropriate values.
PORT = 3000
NODE_ENV = development
MONGO_LOCAL = your_local_db_URI
MONGO_PROD = your_production_db_URI
These variables can be directly accessed using process.env.VARIABLE but I feel we can do better. We will create a file that will check if the required variables are available and valid and then export them.
Create a utils folder inside src. Inside utils create a file secrets.ts which will look something like this.
import dotenv from 'dotenv';
import fs from 'fs';

// checking if .env file is available
if (fs.existsSync('.env')) {
  dotenv.config({ path: '.env' });
} else {
  console.error('.env file not found.');
}

// checking the environment, so that we can setup our database accordingly
export const ENVIRONMENT = process.env.NODE_ENV;
const prod = ENVIRONMENT === 'production';

export const PORT = (process.env.PORT || 3000) as number;

// selecting the database URI as per the environment
export const MONGO_URI = prod
  ? (process.env.MONGO_PROD as string)
  : (process.env.MONGO_LOCAL as string);

if (!MONGO_URI) {
  if (prod) {
    console.error(
      'No mongo connection string. Set MONGO_PROD environment variable.'
    );
  } else {
    console.error(
      'No mongo connection string. Set MONGO_LOCAL environment variable.'
    );
  }
  process.exit(1);
}
Now we are ready to create our server.
Setting up the server
Let's create a basic express server, connect it to the DB (database). We will also set our view engine to be ejs so that we can render pages to our client. Your app.ts should look as follows:
import express from 'express';
import { MONGO_URL, PORT } from './utils/secrets';

const app = express();

app.set('view engine', 'ejs');

mongoose.connect(MONGO_URI, () => {
  console.log('connected to mongodb');
});

app.listen(PORT, () => {
  console.log('App listening on port: ' + PORT);
});
Now, let's create our homepage. Create a views folder in the root, this views folder is where our app will look for when it has to render a page. Next, create a home.ejs file which you can fill with basic HTML as follows
<!DOCTYPE html>
<html lang="en">
  <head>
    <meta charset="UTF-8" />
    <meta http-equiv="X-UA-Compatible" content="IE=edge" />
    <meta name="viewport" content="width=device-width, initial-scale=1.0" />
    <title>Oauth App</title>
  </head>

  <body>
    <h1>This is home</h1>
    <a href="/auth/login">Go to login page</a>
  </body>
</html>
We want this home page to be rendered when clients visit the / route. So let's set up the home route and see if the page is rendered. In app.ts add the following route handler.
app.get('/', (req, res) => {
  res.render('home');
});
If you go to http://localhost:3000 you should be able to view the homepage. Yay!
Next up, to set up our authentication routes let's create a folder routes inside the src folder and add a file authRoutes.ts
import express from 'express';
const router = express.Router();

router.get('/login', (req, res) => {
  // this will render login.ejs file
  res.render('login');
});

export default router;
Import this route in app.ts and use it as follows:
import authRoutes from './routes/authRoutes';

app.use('/auth', authRoutes);
This will render a login page when someone visits the route /auth/login as all the routes in authRoutes.ts will be prefixed with /auth.
So, let's create a login.ejs file inside the views folder.
<!DOCTYPE html>
<html lang="en">
  <head>
    <meta charset="UTF-8" />
    <meta http-equiv="X-UA-Compatible" content="IE=edge" />
    <meta name="viewport" content="width=device-width, initial-scale=1.0" />
    <title>Login</title>
  </head>

  <body>
    <a href="/">Homepage</a>
    <h3>Login to Continue</h3>
    <a href="/auth/google">Login with Google</a>
  </body>
</html>
Google Developer Console Setup
Before we continue with our app, we will need to register our app through the Google developer console and get CLIENT_ID & CLIENT_SECRET. Follow these steps:
-
Visit Google Developer Console
-
From the navigation bar at the top, create a new project.
-
Now click on
Enable APIs & Services, scroll down and choose Google+ API and click "Enable".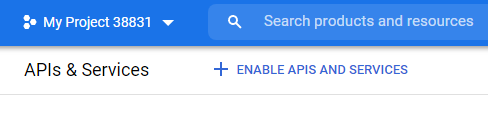
-
Navigate to the
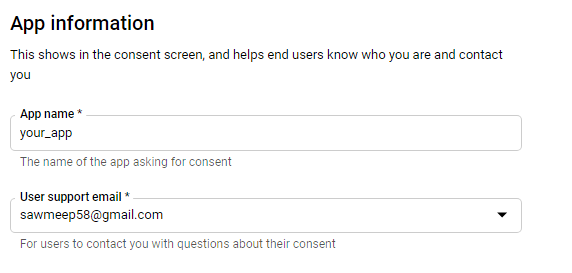
OAuth consent screentab, where will set up our consent screen. You will be asked to choose the user type, chooseExternal, and hitCreate. -
Under App Information, add your app name, email, and logo (optional)
-
Under App domain, add application homepage (it can be http://localhost:3000 for now, later you can change it when you have deployed it). Navigate to the bottom of the page add your email in the "Developer contact information" field and click "SAVE AND CONTINUE".
-
You will be directed to the scopes page, click on "Add or Remove Scopes" and check the first two ie.
userinfo.email&userinfo.profile. Scope means what data do we want to access from the user's Google account. Here we want just the email and profile, if you need more or less data check the boxes accordingly. Now, save and continue.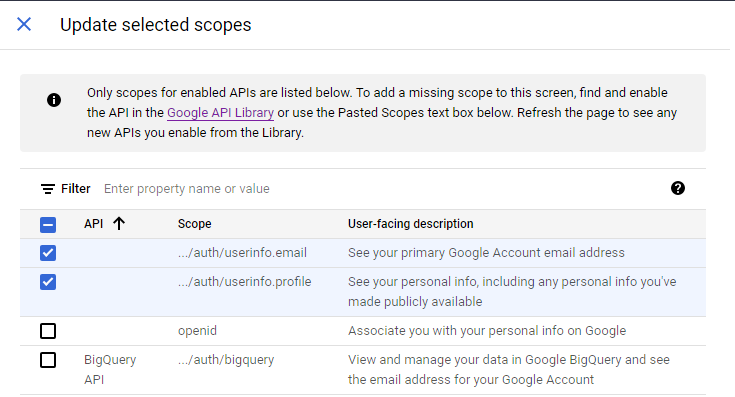
-
Check the summary and see if you've filled the details right and click on "Back to dashboard".
-
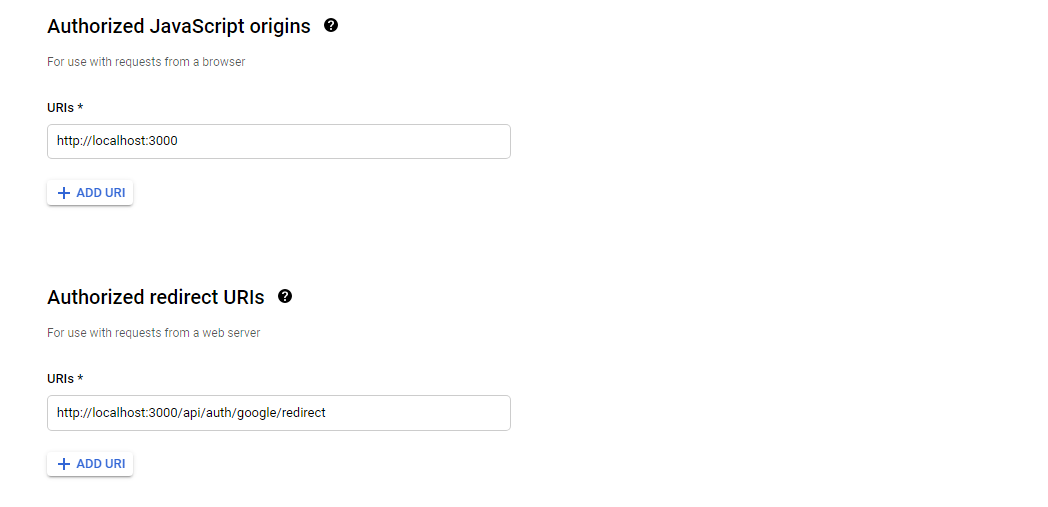
Go to the "Credentials" tab and click on "Create Credentials" and choose the "OAuth Client ID" option. Choose the application type to be "Web Application" and give it a name. In Authorized Javascript Origin, use the current URL of the application i.e
http://localhost:3000. In the authorized redirect URI, put
http://localhost:3000/auth/google/redirect
🚨 Make sure the route is precisely "/auth/google/redirect" because we will set up our routes accordingly. Now hit create.
- You will be provided with
client IDandclient Secretcopy those into your .env as
GOOGLE_CLIENT_ID = your_google_client_id
GOOGLE_CLIENT_SECRET = your_google_client_secret
- Now, in your
secrets.ts, export these credentials as
export const GOOGLE_CLIENT_ID = process.env.GOOGLE_CLIENT_ID as string;
export const GOOGLE_CLIENT_SECRET = process.env.GOOGLE_CLIENT_SECRET as string;
Now that we have our credentials, we can start setting up passport.js strategy in our app.
Passport Setup
Passport is an authentication middleware that will handle most of the complexity of implementing OAuth through different strategies. Passport provides a wide variety of strategies to implement different types of authentication. Here we will set up the passport-google-oauth20 strategy.
First, create a config folder inside src and create a passport.ts inside it which should look as follows:
import passport from 'passport';
import passportGoogle from 'passport-google-oauth20';
import { GOOGLE_CLIENT_ID, GOOGLE_CLIENT_SECRET } from '../utils/secrets';
const GoogleStrategy = passportGoogle.Strategy;

passport.use(
  new GoogleStrategy(
    {
      clientID: GOOGLE_CLIENT_ID,
      clientSecret: GOOGLE_CLIENT_SECRET,
      callbackURL: '/auth/google/redirect',
    },
    (accessToken, refreshToken, profile, done) => {
      // get profile details
      // save profile details in db
    }
  )
);
Now import the passport.ts in your app.ts;
import './config/passport';
In login.ejs, you can see we had an anchor tag that links to the route /auth/google, we will use this route to redirect users to the Google consent screen. So let's set up that route in authRoutes.ts. Add these following lines
import passport from 'passport';

router.get(
  '/google',
  passport.authenticate('google', {
    scope: ['email', 'profile'],
  })
);
You can see we use passport.authenticate() which accepts 2 arguments, first one is the "strategy" we want to use i.e Google in our case, the second is an object that defines the scope.
Scopes are the pieces of data that we want from the user's account.
Now if you go to http://localhost:3000/auth/login and click on login with google, you will hit the route /auth/google which will take you to the consent screen, and if you try to login you will get an error
Cannot GET /auth/google/redirect
This is because, after we login with google, it redirects us to this callback route (which we configured in our developer console ) but we have not yet set up this route in our app. So let's do it.
In the same authRoutes.ts file just below /google route handler, create a handler for /google/redirect as
router.get('/google/redirect', passport.authenticate('google'), (req, res) => {
  res.send('This is the callback route');
});
This will get rid of the error but you might have noticed the consent screen is stuck, this is because the callback function in our passport.ts file is empty. Inside this callback function, we receive data from Google about the user, so this is where we can store the user data in our database.
Storing User Data
Now, we need to set up our database to store the user data. Let's build the user model. Create a folder "models" inside the src folder and inside it create a User.ts file where we can define the schema as:
import mongoose, { Document } from 'mongoose';

const Schema = mongoose.Schema;

export type UserDocument = Document & {
  username: string;
  email: string;
  googleId: string;
};

const userSchema = new Schema<UserDocument>({
  username: String,
  email: String,
  googleId: String,
});

const User = mongoose.model<UserDocument>('User', userSchema);

export default User;
As you can see we will only store the username, email, and googleId which will help us to identify users. We are also exporting a type "UserDocument".
Now let's complete our callback function in passport.ts
passport.use(
  new GoogleStrategy(
    {
      clientID: GOOGLE_CLIENT_ID,
      clientSecret: GOOGLE_CLIENT_SECRET,
      callbackURL: '/auth/google/redirect',
    },
    async (accessToken, refreshToken, profile, done) => {
      const user = await User.findOne({ googleId: profile.id });

      // If user doesn't exist creates a new user. (similar to sign up)
      if (!user) {
        const newUser = await User.create({
          googleId: profile.id,
          name: profile.displayName,
          email: profile.emails?.[0].value,
          // we are using optional chaining because profile.emails may be undefined.
        });
        if (newUser) {
          done(null, newUser);
        }
      } else {
        done(null, user);
      }
    }
  )
);
This callback function receives an accessToken and refreshToken
- accessToken - accessToken allows the application to make API requests to access or modify users' data on their behalf.
- refreshToken - accessToken expire after a certain time, so we use refreshToken to refresh them.
We won't be needing these two tokens in our current app for now.
This callback function also receives a profile as you can see. Using the google id we get from the "profile", we will check if the user exists in our database, if it does we will pass it using the "done" function that we received otherwise we will first create & save the user and then pass it using the "done" function. What this "done" function does is, it passes the user information so that it can be accessed by passport.serializeUser for login sessions
Serialize & Deserialize User
Passport has a serializeUser method which receives user data from the passport callback function i.e from done(null, user) and stores it in a cookie, (when done function is called). Here we are storing only user.id which will help us identify the user. Let's add this method in passport.ts
passport.serializeUser((user, done) => {
  done(null, user.id);
});
Passport has a deserializeUser method that reads the cookie and gets the stored user id, here we use that Id to find the user in our database and after we call done function it attached that user data into our request, which can be accessed through req.user. Let's add this method in passport.ts
passport.deserializeUser(async (id, done) => {
  const user = await User.findById(id);
  done(null, user);
});
In the serialize method, You might have encountered a typescript error:
Property 'id' does not exist on type 'User'
To understand this error, let's look at the type definition file of passport.js. In VS Code you can press Ctrl and click on the package name from any of the import statements, or simply navigate to
node_modules > @types > passport > index.d.ts
You should see something like this. Note: This is just a small portion of the code
declare global {
  namespace Express {
    // tslint:disable-next-line:no-empty-interface
    interface AuthInfo {}
    // tslint:disable-next-line:no-empty-interface
    interface User {}

    interface Request {
      authInfo?: AuthInfo | undefined;
      user?: User | undefined;
    }
  }
}
As you can see, this type definition file overrides the interface of Request and adds a property user whose type is an empty interface, so that's the reason, for the error because there is no property id in User.
So to solve this, create a typings folder inside src folder. Inside the typings folder create an express folder and inside it create a file index.d.ts. This is where we will override the type of User.
Your index.d.ts should look something like this
import { UserDocument } from '../../models/User';

declare global {
  namespace Express {
    interface User extends UserDocument {}
  }
}
Here we are setting the User interface to extend UserDocument interface which we created in the UserModel.ts.
Now go to your tsconfig.json file and add typeRoots value as
"typeRoots": [
      "./src/typings",
      "./node_modules/@types"
    ]
Now the error should be fixed, so let's move on.
Setting up cookies
To store session data in a cookie, we will use the package "cookie-session" and also initialize passport to use sessions in app.ts. We can do that using the following code:
import cookieSession from 'cookie-session';
import passport from 'passport';
import { COOKIE_KEY } from './utils/secrets';
// setting up cookieSession
app.use(
  cookieSession({
    maxAge: 24 * 60 * 60 * 1000,
    keys: [COOKIE_KEY],
  })
);

// initialize passport
app.use(passport.initialize());
app.use(passport.session());
As you can see "cookieSession" requires a secret key that will be used to encrypt the cookies, which we are importing from "utils/secrets.ts". But we haven't really exported it. so let's do that.
First, add the secret key in your .env file, the value can be literally any random string you want:
COOKIE_KEY = any_long_and_random_string
And then, In your secrets.ts add this line:
export const COOKIE_KEY = process.env.COOKIE_KEY as string;
That was a lot, wasn't it? Just to check if you got everything correctly setup, your app.ts should look something like this:
import express from 'express';
import mongoose from 'mongoose';
import { COOKIE_KEY, MONGO_URI, PORT } from './utils/secrets';
import authRoutes from './routes/authRoutes';
import './config/passport';
import cookieSession from 'cookie-session';
import passport from 'passport';

const app = express();

app.set('view engine', 'ejs');

app.use(
  cookieSession({
    maxAge: 24 * 60 * 60 * 1000,
    keys: [COOKIE_KEY],
  })
);

app.use(passport.initialize());
app.use(passport.session());

mongoose.connect(MONGO_URI, () => {
  console.log('connected to mongodb');
});

app.use('/auth', authRoutes);

app.get('/', (req, res) => {
  res.render('home');
});

app.listen(PORT, () => {
  console.log('App listening on port: ' + PORT);
});
Now, if try to login, you will successfully get a message "This is the callback route" which means your login is complete.
Setting up the profile page
Instead of just giving a message let's redirect the user to something meaningful, like a profile page.
So, in authRoutes.ts, navigate to /google/redirect route and change the controller function as:
router.get('/google/redirect', passport.authenticate('google'), (req, res) => {
  res.redirect('/profile');
});
Now as the user signs in, they will be redirected to the /profile route, but we have not created it yet. So, let's create a profileRoutes.ts file in your src/routes folder.
import express from 'express';
const router = express.Router();

router.get('/', (req, res) => {
  res.render('profile', { user: req.user });
});

export default router;
Here we are rendering a profile page (i.e profile.ejs which we have not created yet) and passing in an object that contains the user's data, which we can use in our markup in profile.ejs.
So, now create a profile.ejs file in the views folder. Ejs helps us embed javascript in our markup, so we can use the user data that we passed and render it to the browser.
<!DOCTYPE html>
<html lang="en">
  <head>
    <meta charset="UTF-8" />
    <meta http-equiv="X-UA-Compatible" content="IE=edge" />
    <meta name="viewport" content="width=device-width, initial-scale=1.0" />
    <title>Profile Page</title>
  </head>

  <body>
    <h1>Profile Page</h1>
    <% if (user) { %>
    <h3>Username : <%= user.username %></h3>
    <h3>Email : <%= user.email %></h3>
    <a href="/">Homepage</a>
    <a href="/auth/logout">Logout</a>
    <% } %>
  </body>
</html>
Now, to use this route in our app, we need to import it in our app.ts and use it as
import profileRoutes from './routes/profileRoutes';

app.use('/profile', profileRoutes);
The next problem we need to tackle is that anyone can access the /profile route. We don't want that, we only want those users who are logged in to access that page.
So to handle this let's create a middleware function, in your profileRoutes.ts create a function "checkAuth".
const checkAuth = (req: Request, res: Response, next: NextFunction) => {
  if (!req.user) {
    res.redirect('/auth/login');
  } else {
    next();
  }
};
Now let's add this middleware function in our /profile route handler that we created previously
router.get('/', checkAuth, (req, res) => {
  res.render('profile', { user: req.user });
});
Now that we have a login system in place, let's add a way for users to log out. In authRoutes.ts add a logout route as
router.get('/logout', (req, res) => {
  req.logout();
  res.redirect('/');
});
Our app now has a good authentication system. Now let's improve a few more things.
Tackling a few concerns
Currently, our /auth/login route can be accessed even by logged-in users, which doesn't need to happen, so let's redirect users to the profile page if they try to access the login page.
In authRoutes.ts, change the /login handler as
router.get('/login', (req, res) => {
  if (req.user) {
    res.redirect('/profile');
  }
  res.render('login');
});
Here we are doing a simple if check to see if req.user exists and redirect them to the /profile route.
Now, on our homepage too, there is a link to go to the login page even for the logged-in user which is unnecessary, so let's add a link to the profile page if the user is logged in.
To do that we have to pass user data to our view, in app.ts change the / route handler as
app.get('/', (req, res) => {
  res.render('home', { user: req.user });
});
Now in home.ejs file, add an if check to render different anchor tags as per the auth state.
Here's what the body should look like:
<body>
    <h1>This is home</h1>
    <% if (user) { %>
        <a href="/profile">Go to Profile Page</a>
    <% } else { %>
          <a href="/auth/login">Go to login page</a>
      <% } %>
</body>
Conclusion
There you have it. We have successfully built an app with complete authentication. I hope this tutorial was helpful. If you had any problems following the tutorial or just wanna compare your code with mine, you can check out the project on github.
Github Link: https://github.com/SamipPoudel58/nodejs-ts-google-oauth
If you have any other questions, hit me up on Twitter.
Twitter Link: https://twitter.com/samip4sure
← Back to the blog